When I delved into the world of watercolour painting five years ago, my journey was greatly enriched by the acquisition of a precious resource - "The Great Age of British Watercolours" by Andrew Wilton and Anne Lyles. This exquisite exhibition record, produced in collaboration with the Royal Academy of Arts in London, opened my eyes to the fascinating period spanning from 1750 to 1880, a time when British watercolour artistry flourished.
One of the most captivating sections of the book, titled "The Structure of Landscape," delves into the development of British landscape painting in watercolours. Here, the authors meticulously dissect the works of influential artists who played pivotal roles in shaping the course of watercolour art history. Through their insightful analysis, they shed light on the innovative techniques and approaches pioneered by these artistic luminaries.
Among the notable figures discussed in this section are Alexander Cozens, William Gilpin, John Sell Cotman, Thomas Gainspborough, Thomas Girtin, Thomas Hearne and of course J.M.W. Turner.
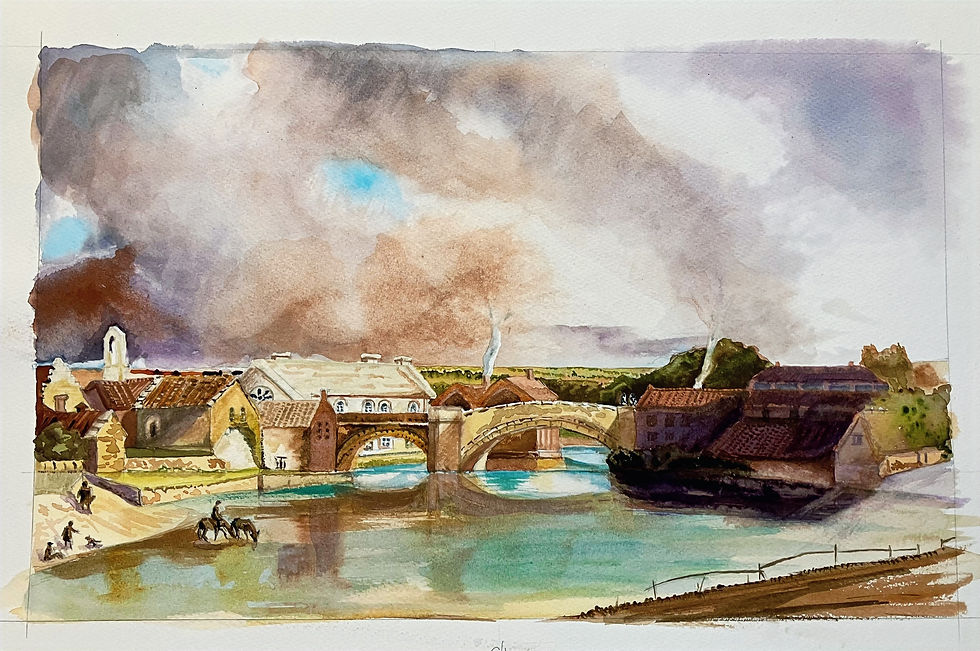
Thomas Girtin's paintings are of particular interest to me. They have one thing in common; simplicity of composition, bold washes and a keen attention to light and shade. For me it is his painting c. 1802 of Morpeth Bridge that demonstrates this, with it's moody sky and shaded elements of the bridge and buildings. I have discussed in previous notes that I believe following the masters and producing your own version of their work is an education in itself. Whilst many will disagree I have always learned something from trying to replicate one of the paintings of a renowned master. This is not about creating a piece of work for sale it is an educational exercise in skill development and the mastering of composition.
Step 1 Foundations
If there is one thing I have learned about producing a good watercolour, I believe it is essential to get the composition and drawing right. It must have enough detail prior to adding paint and, where appropriate, rubbing back the pencil lines so that they do not show. You can lift off paint but once painted, pencil lines won't budge. Morpeth Bridge appears at first to be a relatively simple composition but creating the sketch below took nearly three hours. Each element had to be scaled to fit the chosen paper size 300mm x 450mm (12" x 18")

Step 2 Masking & Sky Development
The atmosphere of this painting is heavily influenced by the sky. Consequently, I chose to mask elements that extended beyond the horizon line. This decision enabled me to apply various washes boldly, starting with cerulean blue after moistening the area with a wet sponge. While the washes were still damp, I incorporated darker tones and shadow colours, selectively lifting them out as needed. Subsequently, I allowed the sky to dry completely before removing certain masked elements and proceeding to Step 3.
Sky's are never easy and Girtin's are certainly bold and dramatic. If you have never approached a sky like this before I would strongly recommend creating a trial sky on a separate piece of paper to save having to start again. The version below took three or four washes and lots of lifting out to produce something I was happy with.

Step 3 Washes, Focal Point and Approach
As a right-handed person, I consistently begin on the left side of my work, and Step 3 was no different. This photo was captured at the conclusion of Day 3 (approximately 6 hours of work spread across the three steps to reach this stage). The masking fluid has been taken off, and the church, which is the focal point behind the left bridge span, has been accentuated by surrounding it with darker structures and sky on all sides.

Step 4 It's all about the light and shade.
You will notice quite a lot changed between Step 3 and Step 4. With the benefit of a day away from the work, something I force myself to do these days and with critique from my wife the following changes were made to the artwork before framing.
The sky reflection in the river water was darkened
Bridge and building reflections were also washed with a shaddow tint
All figures were added and finished
The smoke from the distant chimneys was reworked
The right hand buildings were finished and washed to further highlight the focal point, the church.
With still some minor changes to be made to the smoke and river shades by the end of Day 3 we were almost there.

Minor changes made here is the framed version.
